Wednesday, December 11, 2024

How to Draw a Gingerbread Man - Free Directed Drawing Art Lesson

Let's create a festive gingerbread man! Grab your paper and drawing materials, and follow these steps:


1.  Head - Draw a large oval or circle for the head. Make sure it's centered at the top of your paper.


2.  Body - Just below the head, draw a slightly elongated oval or rectangle for the body. It should be about twice the height of the head. 


3. Arms - From the top sides of the body, draw two curved lines extending outward and s lightly upward to form the arms. They should be about the same length as the body. You can erase the top of the oval inside the body.


4. Legs  - From the bottom of the body, draw two slightly curved lines extending downward for the legs. They should be a little longer than the arms.


5. Face  - Add two small circles for the eyes and a larger circle or oval for the mouth. You can add a small dot in each eye for the pupils. Draw a curved line or small oval for the nose


6. Buttons - Draw three small circles down the center of the body for buttons. You can make them different colors to add some fun detail. Also, erase the bottom curve of the circle head.


7. Details - Add wavy lines around the edges of the arms, legs, and head to represent the icing.

   - You can add more decorations like a bow tie, stripes, or patterns on the gingerbread man's body.


8. Coloring - Color the gingerbread man brown to represent the cookie.

   - Use bright colors for the icing, buttons, and other decorations.


And there you have it—a delightful gingerbread man ready for the holidays! 🎄🍪


Enjoy your drawing, and feel free to add any additional details to make it even more festive! 


For fun holiday early finishers worksheets, visit my TPT SHOP: Art Sub Lessons.

Tuesday, December 10, 2024

Keeping Students Engaged as Winter Break Approaches

 Keeping Students Engaged as Winter Break Approaches: The Perfect Art Activity Collection

As winter break approaches, teachers everywhere face the challenge of keeping students focused and engaged. The excitement of the holidays can make it tough to hold their attention with regular lessons. This is where our Winter and Christmas Art Worksheets collection comes to the rescue!


Why This Collection is a Game-Changer

Our collection is designed with teachers in mind, offering a variety of engaging art activities that are perfect for the festive season. Here’s how it can help:

  1. Engaging and Fun: Each worksheet is packed with creative prompts and sample details that inspire students to create their own unique designs. The festive winter and Christmas themes add a touch of holiday magic that captivates their imagination and keeps them engaged.

  2. Versatile Use: These worksheets are perfect for a wide range of uses. Whether you need activities for early finishers, a ready-to-go sub plan, or engaging tasks for your learning centers, this collection has you covered. It’s also great for classroom teachers who want to add a little extra fun to their lessons as the holiday season approaches.

  3. Easy Implementation: The worksheets include lightly drawn designs that serve as templates for students to build upon. This makes it easy for students of all skill levels to participate and create beautiful, symmetrical artworks without feeling overwhelmed.

    4.  Skill Development: While having fun, students are also learning important concepts like radial symmetry and enhancing their design skills. This makes the activities both enjoyable and educational—a perfect blend for any classroom.

    5.  Stress-Free Prep: As a teacher, your time is precious. These no-prep worksheets mean you can spend less time planning and more time enjoying the holiday season. Simply print and go!

    Don’t just take our word for it! Here’s what teachers who have used this resource have to say:

    "This was great for any class and fun to leave for a sub!"

    "I put this in my early finishers bin and the kids were excited to complete the activity!"

    "My younger grades love this and the other products like it. They are so excited when I pull them out. "

    Check out this bundle at the TPT shop: Art Sub Lessons


Wednesday, December 4, 2024

Winter Art Sub Plan: Beyond the Gingerbread Man

 Ready-Made Gingerbread Man - Winter Art Sub Plan


Tired of scrambling for sub plans? This gingerbread house art sub lesson is your perfect solution! Ideal for Christmas or any time of year, it's designed to be no-prep and fun.

In this Lesson Plan:

  • Explore various gingerbread houses and unique gingerbread creations like robots and dinosaurs.

  • Students draw their own creative designs using simple materials: paper, pencil, and crayons.

  • Optional writing prompt worksheet to extend the lesson.

    To find out more about this lesson, click here:  TPT Shop: Art Sub Lessons

Tuesday, December 3, 2024

How to Draw a Christmas Tree - Free Directed Drawing

 How to Draw a Christmas Tree - Directed Drawing

drawing of a Christmas Tree


Let's create a festive Christmas tree. Grab your paper, pencils, and perhaps some colorful markers or crayons:

1. **Triangle Outline**:

   - Start by drawing a large triangle in the center of your paper. This will be the outline of your tree. Draw it lightly so that you can erase it easily later.

2. **Branches**:

   - Along the sides of the triangle, draw several curved lines to create the look of pine branches. These lines should fan out slightly and get smaller as you move up the tree. 

3. **Tree Trunk**:

   - At the bottom center of the triangle, draw a small rectangle for the tree trunk.

4. **Decorations**:

   - Erase the lightly drawn guidelines you drew in the beginning. Draw strings of lights or garlands by adding curved lines that wrap around the tree.

- Add circles and ovals for ornaments, scatter them throughout the tree. You can also add a star at the top of the tree by drawing a small, five-pointed star.

5. **Presents**:

   - Draw small rectangles and squares at the base of the tree to represent presents. Add bows and ribbon details to make them festive.

6. **Coloring**:

   - Color the tree green, the trunk brown, and the ornaments in a variety of bright colors. Use yellow for the star and different shades for the lights and garlands.


7. **Background**:

   - Add some background details like snowflakes, a snowy ground, or even a fireplace with stockings.

And there you have it—a beautiful, festive Christmas tree! 🎄✨


Would you like some easy and fun worksheets for the Christmas season? Check these out at my TPT shop: Art Sub Lessons

Here are some examples: 

Create an Elf in Disguise.    Only $.99

Create a Reindeer in Disguise.   Only $.99

Doodle a Nutcracker. Only $.99

Draw a Gingerbread House. Only $.99

There also some full length art sub lessons there for you to buy.

Doodle Monsters in Winter. Only $4.00

Doodle Monsters at Christmas.  Only $4.00


Friday, November 29, 2024

Upper Elementary & Middle School Christmas Art Lesson-Doodle Monsters

Emergency Art Sub Lesson Plan: Doodle Monsters with a Winter/Christmas Theme

This art sub plan is a lifesaver for those unexpected days when you need to take emergency leave or sick days from school. Keep it in your emergency sub binder and have peace of mind knowing you’re prepared.


Check out the in-depth preview here: Middle School Christmas Art Lesson: Doodle Monsters and add it to your WISH LIST.  TPT Cyber Sale is Dec. 2 and 3!!!

The lesson is fully scripted and comes with plenty of visuals to guide students through each step. It's perfect for keeping students engaged and learning, even when you can’t be there in person.

It can be taught as a projected lesson or printed out and shown up close.


Students will learn about overlapping and shading while drawing something fun.


This Lesson Contains:

  • 15 Pages of Scripted Lesson Content: Full of engaging visuals. The teacher just reads the script and shows the pictures.
  • Instructions for the Teacher: How to begin and end the lesson.
  • 3 Student Examples: Print and hang these up for inspiration if you like. 
  • 2 Black and White Line Drawings: Print as coloring pages for students who need extra help or differentiation if you like. Pages 23 and 24.
  • 1 Page of Details to Add: Includes a variety of eyes, mouths, hats, candies, and doodle monsters. Print them out and display or place a copy on each table if you like

Tuesday, November 12, 2024

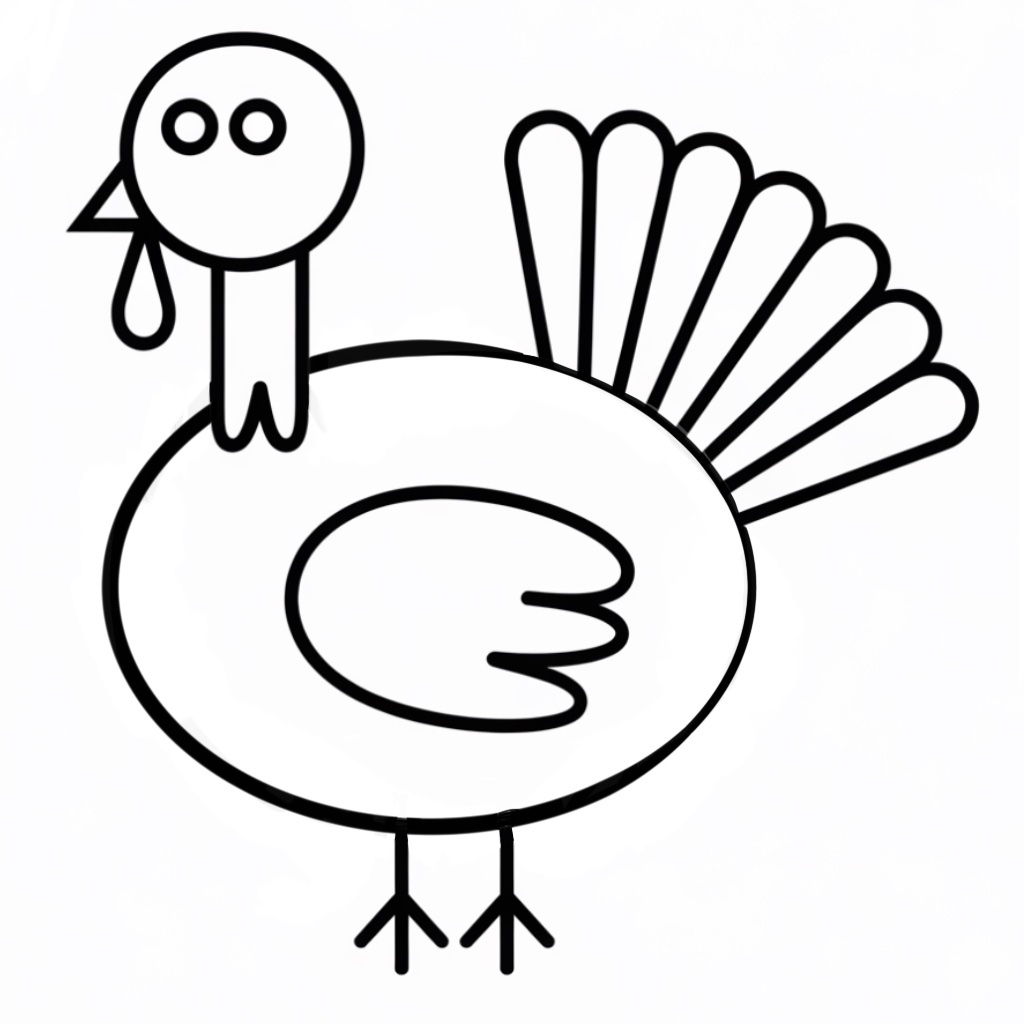
How to Draw a Turkey - Free Elementary Art Sub Lesson

Step-by-Step Turkey Tutorial


Why draw turkeys???

Drawing fall turkeys isn’t just about cute pictures—it’s a fantastic way to help kids learn, grow, and have a ton of fun. Here are some reasons to consider teaching this lesson:

1. Drawing helps kids build their tiny hand muscles.

2. Turning simple shapes into a turkey sparks creativity. Kids start seeing the world in exciting new ways.

3. When kids finish their turkey drawings, they feel super proud. It's a great confidence boost.

4. Figuring out where to put each shape helps kids develop critical thinking skills.

5. Drawing with shapes is a sneaky way to teach math. Who knew turkeys were so educational?

6. Drawing a turkey can lead to chats about Thanksgiving and traditions.

7.  Adding little details to their drawings helps kids improve their concentration.

8.  Each turkey is a little masterpiece that reflects the child's personality.

So, with that, let's get started.

1. Start by drawing a big oval in the middle of the paper. This will be the turkey's body.


2. Draw a small circle above the turkey, to the side a little.


3. Draw two lines down from the head to the body. This makes the neck. You can draw a bumpy line between the lines or draw a straight line. 


4.  Draw a small triangle on the side of the head for a beak and two small circles inside the head for the eyes.


5.  Draw a curved shape under the head for the waddle.


6.  On the back of the oval body, draw ling curved shapes for the tail feathers. Draw was many as you like.


7. Inside the body, draw a "C" shaped curve for the shape of a wing. On one end of it you can draw a bumpy line to make it look like feathers are sticking out.


8.  On the bottom of the turkey, draw two straight lines for the legs. Then, draw three lines out from each to look like the turkey feet.


What can you ado after you draw it?

You can fill it with pattern.


You can add a background.


You can color it in. 


Where can you find turkey lessons that are ready to hand to a sub?

If you would like some ready made art sub lessons and early finishers worksheets, check these out in my TPT shop: Art Sub Lessons.

Click to see Create a Turkey in Disguise print and go lesson. You can buy this, print it out, and you are ready to teach it. Or add it to your wish list for later!


Click to see the worksheet Create a Turkey in Disguise early finishers worksheet. It is ready for you to purchase and print out or you can add it to your wish list!


Friday, November 1, 2024

Elementary Art Sub Plan - Desert Cactus Directed Drawing

 2 in 1 Art Sub Lesson

In my quest to try and make a teacher's life a little easier, I created a lesson that can be taught in kindergarten through 4th grade. It is a directed drawing but with plenty of room for personal expression.


The lesson starts out with step-by-step instructions for how to draw a patterned pot with a prickly pear cactus inside. That is for the kindergarten and first grade students. 

After they are led through how to draw that and color in neatly, the lesson for 2nd, 3rd, and 4th grade begins. Those grade will add a desert landscape to their drawing. 


By combining them all in one, your substitute teacher only has to attend to one lesson plan all day. (I subbed for a while after I retired, so I know how important it is to make the sub's life as uncomplicated as possible!!!)

The drawing uses the most simple materials: paper, pencil, and crayon.

It is no prep. All you have to do is print out the lesson or set it up to be projected. It can be taught either way. 

Check it out here at my TPT shop:  Desert Cactus Creations: Patterned Pots and Scenic Backgrounds for K-4


Sunday, October 27, 2024

Art Sub Lesson Plan - Quirky Novelty Architecture

 Novelty Architecture - aka Duck Architecture


As art teachers, we're always on the lookout for for unique and engaging lessons that spark our students' creativity and curiosity. One such fascinating topic is "duck architecture." But what exactly is it?

The Big Duck Building in Flanders, NY. Photo courtesy of Wikipedia. CC-BY-SA-4.0.  Mike Peel (www.mikepeel.net).

What is Duck Architecture?

The term "duck architecture" was coined in 1968 by architects Rober Venturi and Denise Scott Brown. It refers to buildings that are shaped like the products they sell or represent. Imagine a giant ice cream cone for an ice cream sop or a massive duck for a farm stand selling duck eggs.  These buildings ae not just functional, they are also whimsical and eye-catching, making them perfect subjects for an art lesson.


Teapot Dome Service Station in Zillah Washington. Photo is courtesy of Wikipedia and is in the public domain.

Kids love the opportunity to let their imaginations run wild. They can be so creative drawing their imaginary duck building. 

I have written up a drawing lesson about duck architecture that is suitable to hand to a sub. 

With this lesson, your sub will read the script, pose questions, and show visuals to introduce students to this fun concept. Then, the kids will get to design their own "duck architecture" masterpiece. No cookie-cutter designs here—every child's drawing will be one-of-a-kind!


I tried really hard to create a lesson with lots of visuals and examples to inspire your students.  Here are thumbnails to give you an idea of what your students will see.


There are also instructions for you sub to let them know how to set up and end the lesson.


The materials needed are simple: paper, pencil, and crayon (or marker, if you prefer)


Whether you project it as a PowerPoint or print it out for a close-up look, all the sub or teacher has to do is follow the simple directions. Get ready for a fun and unique learning experience!


I don't want you spending hours writing a lesson plan for your sub, when you likely are in a hurry. So, check out this sub plan here in my TPT shop:  Quirky, Big Duck Architecture.


 If are interested in other art lessons related to architecture, you might like these:


A Home with an Onion Dome


A Tree House for Me