Name Art Projects as Art Sub Lessons
During back to school season, teachers love teaching art lessons using students' names. I have found 15 art name lessons, mostly of which are fully formed and can be taught by a sub. Here are some ideas for name art projects to inspire you.
Why do teachers like to teach name art lessons?
Art teachers often have hundreds of students a semester. Learning their names is not an easy task. The more often you connect the student with their name, the more helpful. So, seeing a child with their name art can't hurt that, right?
And sometimes one of the first art lessons of the year is to create a folder for their artwork. A name activity works well for that.
Many of the name art lessons I have seen are "no fail." That's always a plus for the new school year!
Cool name art lessons
These lessons are simple enough that a substitute teacher could teach them. These all have instructions included and use simple materials.
Symmetrical Alien Names @ Charity Mika
This blog post shows instructions and sample art work.
MATERIALS
• Copy paper, 11″ x 17″ works well
• Black Sharpie Marker
• Crayons/Markers/Oil Pastels/Chalk
Art with Kids: Rollercoaster Names @ Jones Design Company
Has instructions and plenty of samples.
This blog post has full instructions and examples of finished work.
Materials
- Pencils
- 5’’ Cardboard Squares for students to trace
- One 4.5’’ tracing paper square for each student
- One 9’’ white copy paper square for each student.
- Markers and colored pencils.
Tried and True: Kaleidoscope Name Designs@ Paint On All the Tables
This blog post has step by step instructions with photos.
Materials
- Pencils
- One 9’’ white copy paper square for each student.
- Markers and colored pencils.
Name Monster Tutorial @ Saskatoon Community Youth Arts Programming, Inc.This blog post has instructions and step by step photos.
Materials
Pencils
- Paper
- Scissors
- Markers and colored pencils.
Fun Name Art @ Happy Family Art
This post includes directions and step by step photos.
Materials
paper
pencil
Sharpie
This post has instructions, photos, and a video.
Materials
Paper - long strips
Pencils
Markers
This blog post has photos and a description of how to do it.
It uses the most simple supplies, is fully scripted, and can be taught by anyone.
Materials
Long strips of paper
pencils
crayons or markers
This includes instructions and photos.
This would work well for preschool and kindergarten. There are step by step instructions with photos. There is some prep you would need to do ahead of time.
Materials
Paper
Washi Tape (or painters tape)
This post includes a downloadable .pdf.
Materials
Paper
Colored pencils
Glue
This post is an idea for a lesson that includes a literary component. It will include some prep ahead of time.
Materials
Paper - colored
glue sticks
This link leads you to a post I wrote about a lesson by Betsy Morningstar.
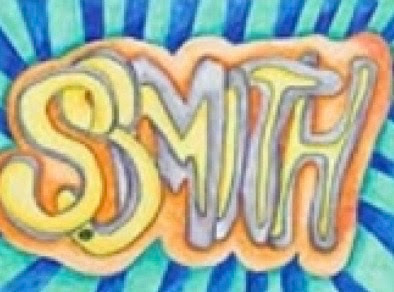
Radial Name Design
Originally, this went to a lesson at Art4Cast, but the post no longer exists. I wrote a blog post on my blog about the idea.
Materials
Paper cut into large squares
Pencils
Crayon or markers
This is a fully formed art sub lesson that anyone can teach. It uses the most simple materials.
Materials
Paper
Pencils
Sharpies, crayons, or markers
You can find this at my TpT Shop: Art Sub Lessons
Checklist for Creating a Sub Folder