7 Halloween Themed Art Lessons
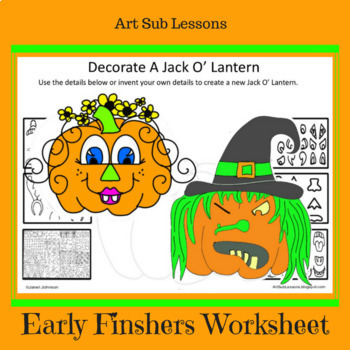
Here's an extra goodie of my own. Subs will love it if you leave a worksheet for those early finishers!!! This worksheet has an assortment of details for decorating their jack o' lantern. It also has a lightly drawn-in pumpkin for them to use as a base. As a complete lesson, students could draw on another sheet, their own pumpkin shapes and use the worksheet as a reference. There is also a sheet with 3 sample decorated pumpkins. $.99 at my TeachersPayTeachers shop: Art Sub Lessons.
I found the most wonderful Halloween lessons that could be turned into art sub lessons. Check these out!!!
Amy, at Makes and Takes, gives step-by-step instructions and many visuals for this lesson. She used black paper and oil pastel, but this could easily be done with crayons on lighter paper.
***
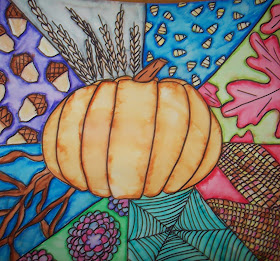
At Panicked Teacher, Susie gives you step-by-step instructions on how to make this patterned pumpkin. I believe she is a classroom teacher who has to supplement art instruction in her class for most of the school year.
I adore this lesson. Jana's students (Room9Art) begged her for a Halloween lesson every year. She finally came up with this. I believe a sub could teach this with the right directions. (Her blog no longer exists, but this is what she posted about the lesson on Pinterest. "The crayon coloring needed to be hard enough to deposit a thick layer of wax. Watered-down tempera paint was applied right over the drawing to create these wonderful crayon resist pictures! Every October I hear, " Can we do a Halloween lesson?" and my usual answer is "probably not". Instead of fighting the urge, this year I compromised and decided to combine a cultural theme with Halloween imagery that my students were familiar with and motivated by. The results are spooky, highly detailed, and fun to look at! I made several handouts with a variety of photographs of Native American totem poles, most of which are located in British Columbia. We also read about the process of carving a totem pole as well as the meanings and traditions associated with the display of the poles. I was primarily concerned with the overall design that was evident: Students would be asked to make a stack of characters that had visual impact, strong connections between each part, and a variety of details. . These Halloween stacks are twenty-four inches tall and nine inches wide. We drew a rough draft first, made revisions, and went on to final drafts on white paper. Students drew each part with a regular pencil and outlined it with a black sharpie marker. I asked them to use many types of crayons including metallic glitter crayons and construction paper crayons. They needed to color heavily because we would be applying diluted purple tempera paint over the entire picture. This process is called crayon resist. The purple paint toned down the colors of the crayons just enough to add to that spooky effect that we were going for! Who says that skulls can only be white? This lime green skull looks amazing! Coloring heavily with the crayons paid off when it came time to see how the paint beaded off the picture as the wax resisted it! Nicole was very motivated to use characters from the movie "The Nightmare Before Christmas". Don't you think she did a great job? Awesome colors and a variety of interesting details are sure to keep the viewer's attention! Avery's Halloween stack is a real balancing act! I especially love the way he perched the bats on Frankenstein's "bolts"! If you enjoyed viewing these images we would love to hear your feedback!")

This lesson, at ArtfulNest, was written for middle school. You could write it up as a fifth-grade lesson or a sixth grade one. You could also bring it down to the upper primary grades with a change of media. Leave your subs some good visuals. They could teach this!
***
Monster lesson. There are lots of wonderful visuals and complete details here. It is taught with paint and gadget prints, but you could so easily adapt it with crayons for your sub lesson. Visit Line FrØslev. There are wonderful things over there.
***
Here's one done for you already. Step-by-step instructions were written here by Ms. Crisco over at Crisco Art. Always a good type of lesson to leave for a sub.
***


